Custom mechanical keyboards have become a global phenomenon in 2025, driven by the growing demand for personalized typing experiences. The market is projected to reach USD 2.42 billion this year, with a remarkable compound annual growth rate of 15% expected through 2032. Gamers, who account for 55.5% of the market, and enthusiasts alike are fueling this trend. At the heart of every custom keyboard lies the mechanical keyboard PCB, the essential component that connects switches, stabilizers, and firmware into a cohesive system. Designing your own PCB unlocks endless possibilities, allowing you to create a keyboard tailored to your unique preferences and needs.
Key Takeaways
- Custom mechanical keyboards are becoming more popular. By 2025, the market is expected to be worth $2.42 billion. Gamers and hobbyists love them for unique typing experiences.
- The PCB in a mechanical keyboard is very important. It connects all the parts and helps with better typing and gaming. A good PCB makes sure keys work well and keeps things simple.
- Pick the right PCB for what you need. Hot-swappable PCBs let you change switches easily. These are great for beginners or people who like to try new things.
- Plan your PCB layout carefully. Make sure it works with your switches and keyboard design. This step is key for a good typing experience.
- Testing and fixing problems are important when building. Check connections and make sure everything works so your keyboard is perfect.
Understanding Mechanical Keyboard PCBs
Role and importance of a mechanical keyboard PCB
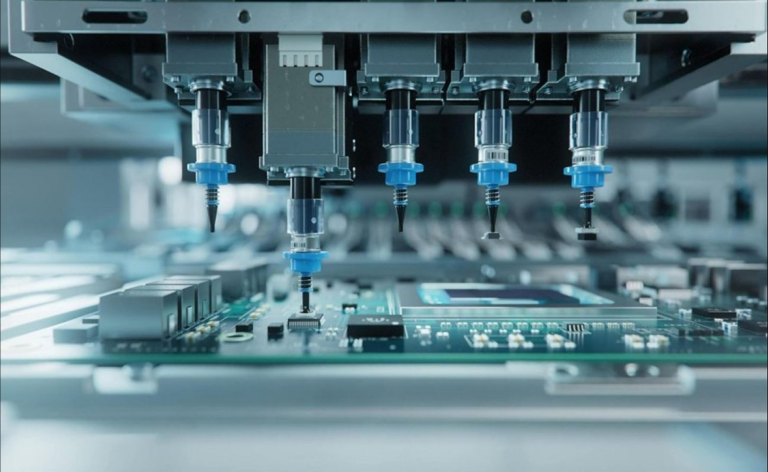
The mechanical keyboard PCB serves as the backbone of your custom mechanical keyboard. It connects all the components, including switches, stabilizers, and diodes, into a unified system. Without it, your keyboard would lack the ability to register keystrokes and communicate with your computer. Think of it as the central nervous system of your keyboard, ensuring every keypress is accurately logged and transmitted.
A well-designed PCB can significantly enhance your typing or gaming experience. For instance, a powerful processor on the PCB allows faster and more stable processing of multiple keystrokes. This is especially crucial for gamers who rely on precision and speed. Additionally, a carefully planned PCB layout minimizes complexity and reduces the risk of crosstalk, making it easier to manufacture and assemble.
“The PCB for a keyboard is the central nervous system of any mechanical keyboard. It brings together switches, stabilizers, and other electronic components into one piece of engineering.”
Types of PCBs for custom mechanical keyboards
When you build custom mechanical keyboards, you’ll encounter several types of PCBs. Each type offers unique features and caters to different user preferences:
- Standard PCBs: These require soldering switches directly onto the board. They provide a stable connection but lack flexibility for switch changes.
- Hot-swappable PCBs: These allow you to replace switches without soldering. They are ideal for enthusiasts who frequently experiment with different switch types.
- Flexible PCBs: These are thinner and more adaptable, often used in ergonomic or compact keyboard designs.
The rise of hot-swappable PCBs has made it easier for beginners to explore custom mechanical keyboards. This shift reflects the growing demand for user-friendly and versatile options.
| Switch Type | Description | Examples |
|---|---|---|
| Linear Switches | Smooth travel without tactile feedback | Cherry MX Red, Black, Silver |
| Tactile Switches | Tactile bump without audible click | Cherry MX Brown, Clear, Grey |
| Clicky Switches | Tactile bump with audible click | Cherry MX Blue, Green |
| Silent Switches | Minimal noise during operation | Cherry MX Silent Red/Black |
Ensuring compatibility with switches, layouts, and firmware
Designing a mechanical keyboard PCB requires careful planning to ensure compatibility with your chosen switches, keyboard layout, and firmware. Start by selecting switches that match your typing style. For example, linear switches offer smooth keystrokes, while tactile switches provide feedback without noise.
Next, decide on your keyboard layout. Whether you prefer a full-size, tenkeyless, or compact design, your PCB must align with the layout to accommodate all keys. Finally, ensure the PCB supports firmware like QMK or VIA, which allows you to program custom key mappings and macros.
A well-thought-out PCB design ensures seamless integration of all components, resulting in a keyboard that performs flawlessly and meets your unique needs.
Tools and Materials Needed
Designing and building a custom mechanical keyboard PCB requires the right tools and materials. This section will guide you through the essential software, hardware tools, and components needed to bring your project to life.
Essential software for PCB design
To design a mechanical keyboard PCB, you need robust PCB design software. Tools like Altium Designer and Altium 365 are industry favorites. These platforms simplify the design process by integrating advanced features such as 3D modeling and cloud-based collaboration. For instance, Altium 365 allows you to share designs seamlessly, making it easier to collaborate with manufacturers or team members. Additionally, its visualization tools help you identify potential design flaws early, saving time and reducing costs.
If you’re new to PCB design, consider beginner-friendly options like KiCad or EasyEDA. These tools offer intuitive interfaces and extensive libraries of components, making them ideal for hobbyists and those looking to build custom mechanical keyboards for the first time.
Key hardware tools for assembly
Once your PCB design is ready, you’ll need specific hardware tools to assemble your mechanical keyboard. Here’s a list of must-have tools:
- Soldering Iron: A high-quality soldering iron ensures precise connections for components like switches and diodes.
- Multimeter: Use this to test electrical connections and troubleshoot issues during assembly.
- Desoldering Pump: This tool helps you remove solder in case of mistakes.
- Tweezers: Essential for handling small components like diodes and resistors.
- PCB Holder: Keeps your PCB steady while you work, ensuring accuracy and safety.
Investing in reliable tools not only improves the quality of your build but also makes the process more enjoyable.
Components required for a custom mechanical keyboard PCB
Before starting your project, gather all necessary components. Here’s a comprehensive table to help you organize your materials:
| Category | Description |
|---|---|
| Preliminary Component List | Includes switches, diodes, resistors, and microcontrollers. |
| PCB Specifications | Details on board size, layers, material type, thickness, copper weight, and surface finish. |
| Design Rules and Constraints | Specific design rules like minimum trace width, spacing, and critical nets identification. |
| Signal and Power Integrity | Information on high-speed signals and power distribution networks. |
| Compliance and Regulatory | Industry standards that the design must comply with, including necessary documentation. |
| Test and Validation Requirements | Requirements for design verification and testing. |
| Timeline and Milestones | Desired project timeline and major milestones. |
Additionally, ensure you have fabrication drawings, Gerber files, and a bill of materials ready for manufacturing and assembly. These documents streamline the production process and help avoid delays.
Pro Tip: Always double-check your keyboard layout and firmware compatibility before ordering components. This ensures your mechanical keyboard functions as intended.
Designing Your Custom PCB
Planning the layout and features of your custom mechanical keyboard
When planning the layout of your custom mechanical keyboard, you must consider both functionality and aesthetics. Start by determining the size and layout of your keyboard. Decide whether you want a full-size, tenkeyless, or compact design. Each layout impacts the number of keys and the spacing between them, which directly affects the PCB design.
Next, ensure compatibility with various switch types, including hot-swappable options if you want flexibility in changing switches. For advanced features, consider adding multiple PCB layers. This approach supports complex designs while balancing cost and flexibility. If you want to enhance the visual appeal, integrate features like RGB LEDs for backlighting. Ensure the PCB supports these components effectively.
Additionally, choose a communication protocol such as USB or Bluetooth. USB offers reliable data transfer, while Bluetooth provides wireless convenience. Include debugging tools and test points in your design to simplify troubleshooting during assembly.
Pro Tip: Use CAD software to model the keyboard enclosure and visualize how the PCB fits within the case.
Creating the keyboard matrix and schematic
The keyboard matrix is the foundation of your mechanical keyboard PCB. It determines how keypresses are registered. To create an effective matrix, assign microcontroller pins to rows and columns. Place a diode on each switch to prevent ghosting, ensuring accurate key detection.
Develop a detailed schematic by selecting components like microcontrollers, switches, diodes, and connectors. Arrange these components logically and label them with unique designators. Connect them based on the circuit topology and add annotations for clarity. Run an electrical rules check to validate the schematic and generate a netlist for PCB layout.
| Step | Description |
|---|---|
| 1 | Create a schematic with components like microcontrollers and switches. |
| 2 | Arrange components logically and label them uniquely. |
| 3 | Connect components based on the circuit topology. |
| 4 | Validate the schematic with an electrical rules check and generate a netlist. |
Developing firmware for functionality
Firmware is the brain of your mechanical keyboard. It translates keypresses into actions. Start by selecting firmware like QMK or VIA, which offer advanced customization options. These platforms allow you to program macros, remap keys, and configure lighting effects.
Tailor the firmware to your PCB design. Assign GPIO pins to rows and columns in the matrix. Optimize the firmware for speed and power efficiency by simplifying logic and reducing unnecessary processes. If your keyboard includes innovative features like NFC or Bluetooth, ensure the firmware supports these functionalities.
Case Study: A custom keyboard with NFC capabilities used tailored firmware to enhance functionality, demonstrating how firmware can unlock innovative features.
Testing is crucial. Flash the firmware onto the microcontroller and verify that all keys register correctly. Debug any issues using the test points included in your PCB design.
Manufacturing Your PCB
Preparing and exporting Gerber files
To manufacture your custom mechanical keyboard PCB, you must prepare and export Gerber files. These files act as the blueprint for your PCB, detailing every layer, trace, and component placement. Start by finalizing your PCB design in software like KiCad or Altium Designer. Ensure all components are correctly placed and connected, and run a design rule check (DRC) to catch potential errors.
Once your design passes validation, generate the Gerber files. Include essential layers such as copper, solder mask, and silkscreen. Don’t forget to add a drill file for holes and vias. Most PCB manufacturers provide guidelines for exporting Gerber files, so follow their specifications closely. Properly formatted files reduce the risk of production errors and ensure a smooth manufacturing process.
Pro Tip: Double-check your Gerber files using a Gerber viewer before sending them to the manufacturer. This step helps you spot any overlooked issues.
Selecting a reliable PCB manufacturer
Choosing the right manufacturer is crucial for producing a high-quality PCB. Start by evaluating manufacturers based on their experience with custom mechanical keyboards. Look for companies that offer advanced features like multi-layer PCBs, hot-swappable switch support, and RGB lighting integration.
Consider their production capabilities and turnaround times. Reliable manufacturers provide detailed quotes, including costs for prototyping and bulk production. Check reviews and testimonials from other keyboard enthusiasts to gauge their reliability. Many users recommend manufacturers like JLCPCB or PCBWay for their affordability and consistent quality.
Key Factors to Evaluate:
- Material Quality: Ensure the manufacturer uses durable materials like FR4 for the PCB base.
- Precision: Look for tight tolerances in trace width and spacing.
- Support: Choose a manufacturer that offers technical support and design feedback.
Reviewing and ordering your custom mechanical keyboard PCB
Before placing your order, thoroughly review your design and specifications. Verify the PCB size, layout, and component placement. Ensure compatibility with your chosen switches, layout, and firmware. If your design includes advanced features like Bluetooth or RGB lighting, confirm that the manufacturer can accommodate these requirements.
When ordering, provide the manufacturer with your Gerber files, a bill of materials (BOM), and any additional instructions. Many manufacturers offer online platforms where you can upload files and customize options like surface finish and solder mask color. After submitting your order, monitor the production process and communicate with the manufacturer to address any issues promptly.
Pro Tip: Start with a small batch for prototyping. Test the prototype thoroughly before committing to larger production runs.
Assembling Your Custom Keyboard
Installing stabilizers and switches
Begin by installing stabilizers on your PCB. Stabilizers ensure larger keys like the spacebar, shift, and enter keys remain stable and balanced during use. Clip the stabilizers into the designated slots on the PCB, ensuring they align with the key layout. Apply a small amount of lubricant to the stabilizer stems and wires to reduce friction and noise. This step enhances the typing experience by making keystrokes smoother and quieter.
Next, install the switches. If your PCB is hot-swappable, simply press each switch into its socket until it clicks into place. For soldered PCBs, insert the switches into the PCB and ensure they sit flush. Double-check the alignment to avoid issues during soldering. Properly installed stabilizers and switches lay the foundation for a functional custom mechanical keyboard.
Soldering components onto the PCB
Soldering is a critical step in assembling your keyboard. Heat your soldering iron to the recommended temperature, typically around 350°C. Begin by soldering the switches. Place the tip of the iron on the switch pin and PCB pad, then feed solder into the joint. Ensure each connection is clean and secure to avoid electrical issues.
After soldering the switches, attach other components like diodes and resistors. Follow the schematic design you created earlier to ensure proper placement. Use a multimeter to test connections as you go. This step ensures your PCB functions correctly and minimizes troubleshooting later.
Final assembly with keycaps and case
Once soldering is complete, assemble the keyboard. Start by attaching the PCB to the case. Secure it with screws, ensuring it fits snugly. Next, install the keycaps. Align each keycap with its corresponding switch and press down firmly. For RGB-enabled keyboards, test the lighting to ensure all LEDs function as intended.
Finally, connect the keyboard to your computer and perform a full functionality test. Verify that all keys register correctly and troubleshoot any issues. Completing this step marks the culmination of your custom mechanical keyboard project.
Tip: Follow these steps for a successful build:
- Create a detailed schematic with components like microcontrollers and switches.
- Design the PCB layout, considering component placement and routing.
- Prototype the PCB with a manufacturer for testing.
- Assemble and test the keyboard, debugging as necessary.
Testing and Finalizing Your Build
Testing the functionality of your mechanical keyboard PCB
Testing ensures your mechanical keyboard PCB operates as intended. Begin by validating the power supply and USB connections. Use a multimeter to confirm proper voltage levels and continuity across the board. Next, test the switch matrix by pressing each key and verifying that it registers correctly. If you’ve programmed firmware, flash it onto the microcontroller and check for accurate key mapping and responsiveness.
Functional testing metrics help validate performance and reliability. For example, burn-in testing involves running the PCB for extended periods to identify early failures. Testing under near-real usage conditions ensures the board performs reliably in the field. These steps confirm that the PCB meets design parameters and prevents potential issues during regular use.
| Metric | Description |
|---|---|
| Burn-In Testing | Operates boards for extended durations to identify early failures. |
| Validates overall board functionality | Confirms the complete board functions properly, beyond just individual components. |
| Catches assembly defects | Identifies issues like faulty solder joints and misplaced parts by testing under operating conditions. |
| Emulates operating conditions | Tests inputs and outputs under near-real usage conditions to ensure correct field functionality. |
Tip: Include test points on your PCB to simplify functionality validation during this stage.
Troubleshooting and resolving common issues
If your keyboard doesn’t function as expected, troubleshooting is essential. Start by inspecting solder joints for cold or incomplete connections. Use a multimeter to check continuity and identify broken traces or short circuits. If certain keys fail to register, verify the diodes and ensure they are oriented correctly. Reflow solder on problematic areas to fix connectivity issues.
Firmware-related problems often stem from incorrect pin assignments or bugs in the code. Double-check your firmware configuration and reflash the microcontroller if necessary. Debugging tools like QMK Configurator can help identify and resolve software issues efficiently.
Pro Tip: Document any recurring issues and their solutions. This practice helps refine your process for future builds.
Performing final quality checks
Final quality checks ensure your mechanical keyboard meets high standards. Conduct key actuation tests to confirm smooth and consistent keystrokes. Perform durability tests by pressing each key multiple times to assess long-term reliability. For RGB-enabled boards, verify that all LEDs function correctly and display the intended colors.
Adhering to quality control standards like ISO 9241-410 demonstrates a commitment to ergonomic design principles. Regular updates to your quality control measures ensure your keyboard remains competitive and meets evolving user preferences.
| Aspect of Quality Control | Description |
|---|---|
| Regulatory Compliance | Adherence to standards like ISO 9241-410 ensures ergonomic design principles are met. |
| Testing and Inspection | Key actuation tests, durability tests, and ergonomic assessments validate performance and comfort. |
| Continuous Improvement | Regular updates to quality control measures reflect evolving standards and user preferences. |
Completing these steps guarantees a reliable and high-performing mechanical keyboard that you can proudly use or share with others.
Designing and building a custom mechanical keyboard PCB is a rewarding journey that combines creativity and technical expertise. Here’s a quick recap of the key steps involved:
- Create a detailed schematic with components like microcontrollers and switches, ensuring proper connections and annotations.
- Design the PCB layout, placing components and routing traces while adhering to manufacturability rules.
- Prototype the PCB to test dimensions and functionality, iterating based on feedback.
- Assemble and test the keyboard by soldering components, programming firmware, and conducting usability tests.
Advancements in electronics design and fabrication technologies have made it easier than ever to start your own project. Many enthusiasts find joy in overcoming technical challenges and blending aesthetics with functionality. The surge in demand for custom keyboards, driven by dissatisfaction with standard options, highlights the appeal of creating a keyboard tailored to your preferences, including the perfect keyboard layout and size.
Building your own keyboard is more than just a technical exercise. It’s an opportunity to express your creativity, learn new skills, and join a vibrant community of like-minded individuals. The satisfaction of typing on a keyboard you designed and built yourself is unparalleled. Why not take the first step today?
FAQ
What is the best software for designing a mechanical keyboard PCB?
You can use software like KiCad or EasyEDA for beginner-friendly options. For advanced users, Altium Designer offers robust features like 3D modeling and design rule checks. Choose software based on your experience and project complexity.
Tip: Start with free tools like KiCad to learn the basics before upgrading.
How do I ensure my PCB design is compatible with my keyboard layout?
Plan your layout carefully. Match the PCB design to your chosen keyboard size (e.g., full-size, tenkeyless). Ensure the switch positions align with the layout. Use firmware like QMK to program the matrix and test compatibility.
Pro Tip: Use online layout generators to visualize your design before finalizing.
Can I build a custom PCB without soldering?
Yes, you can use hot-swappable PCBs. These allow you to install and replace switches without soldering. They are ideal for beginners or those who frequently experiment with different switches.
Note: Hot-swappable PCBs may limit advanced customization options compared to soldered designs.
What materials are essential for assembling a custom keyboard PCB?
You’ll need switches, stabilizers, diodes, a microcontroller, and a soldering kit. For hot-swappable builds, include sockets. Don’t forget tools like tweezers, a multimeter, and a PCB holder for precision.
| Tool/Material | Purpose |
|---|---|
| Soldering Iron | Attaching components |
| Multimeter | Testing connections |
| Stabilizers | Supporting larger keys |
How do I troubleshoot a non-functional PCB?
Inspect solder joints for incomplete connections. Use a multimeter to check continuity. Verify diode orientation and reflash the firmware if needed. Debugging tools like QMK Configurator can help identify software issues.
Reminder: Include test points in your PCB design to simplify troubleshooting.