DIY SMT assembly offers you more than just cost savings. It’s a gateway to mastering valuable skills that align with today’s tech-driven world. As industries embrace automation and AI, hands-on experience with SMT assembly tools and processes helps you stay ahead. You’ll gain precision, problem-solving abilities, and a deeper understanding of electronics.
However, challenges like achieving accurate component placement and troubleshooting soldering issues demand patience and practice. With the right mindset and preparation, you can overcome these hurdles and enjoy the satisfaction of creating functional circuits yourself.
Key Takeaways
- Use basic tools like a small soldering iron, tweezers, and a magnifying glass for accurate SMT work.
- Keep your workspace tidy and neat to work faster and avoid errors.
- Practice on sample boards to gain confidence and improve soldering skills before trying harder projects.
- Check solder joints and parts often to find mistakes early and make strong connections.
- Join online groups to get help, learn from others, and make your skills better.
Preparing for SMT Assembly
Essential Tools and Equipment
Before diving into SMT assembly, you need the right tools to ensure precision and efficiency. Start with a soldering iron with a fine tip. This tool allows you to work on the small, intricate components of your PCB with accuracy. Pair it with tweezers and a magnifying glass to handle and inspect tiny SMT components effectively. These tools are non-negotiable for achieving professional results.
For those looking to streamline the process, consider optional tools like a reflow oven or a stencil printer. A reflow oven simplifies soldering by evenly heating the solder paste, while a stencil printer ensures consistent application of solder paste across the PCB. Investing in these tools can save time and improve the quality of your assembly.
💡 Tip: High-quality tools not only make your work easier but also reduce the chances of errors during assembly.
Materials for SMT Assembly
Gathering the right materials is just as important as having the right tools. Start with PCBs and SMT components that match your project requirements. Ensure your PCB is clean and free of contaminants to avoid soldering issues.
You’ll also need solder paste, flux, and cleaning materials. Solder paste is essential for connecting components to the PCB, while flux improves the flow of solder and prevents oxidation. Cleaning materials help remove excess flux and ensure a polished finish.
- SMT assembly plays a critical role in industries like aerospace, medical care, and automotive, where reliability is paramount.
- The quality of solder paste application directly impacts the performance of your PCB and the final product.
- Proper preparation ensures your soldering process meets the high standards required for functional electronics.
Setting Up Your Workspace
A well-organized workspace sets the foundation for successful SMT assembly. Ensure your area has proper lighting and ventilation. Bright lighting helps you see small details clearly, while good ventilation prevents the buildup of fumes from soldering.
Organize your tools and components systematically. Use labeled containers or trays to keep SMT components sorted and within reach. This reduces the risk of losing parts and speeds up the assembly process.
🛠️ Note: A clean and organized workspace not only boosts efficiency but also minimizes mistakes during assembly.
Step-by-Step SMT Assembly Process
Preparing the PCB
Cleaning the PCB Surface
Before starting SMT assembly, you must clean the PCB surface thoroughly. Dust, grease, or oxidation can interfere with soldering and lead to poor connections. Use isopropyl alcohol and a lint-free cloth to remove contaminants. For stubborn residues, a soft brush can help. This step ensures the solder adheres properly and improves the reliability of your circuit.
🧼 Tip: Always handle the PCB by its edges to avoid transferring oils from your fingers onto the surface.
Applying Solder Paste with a Stencil
Applying solder paste accurately is critical for a successful SMT assembly. Use a stencil to deposit the paste onto the PCB pads. Align the stencil carefully to ensure the paste only covers the intended areas. Use a squeegee to spread the paste evenly, maintaining consistent pressure and speed. Proper application minimizes defects and ensures strong solder joints.
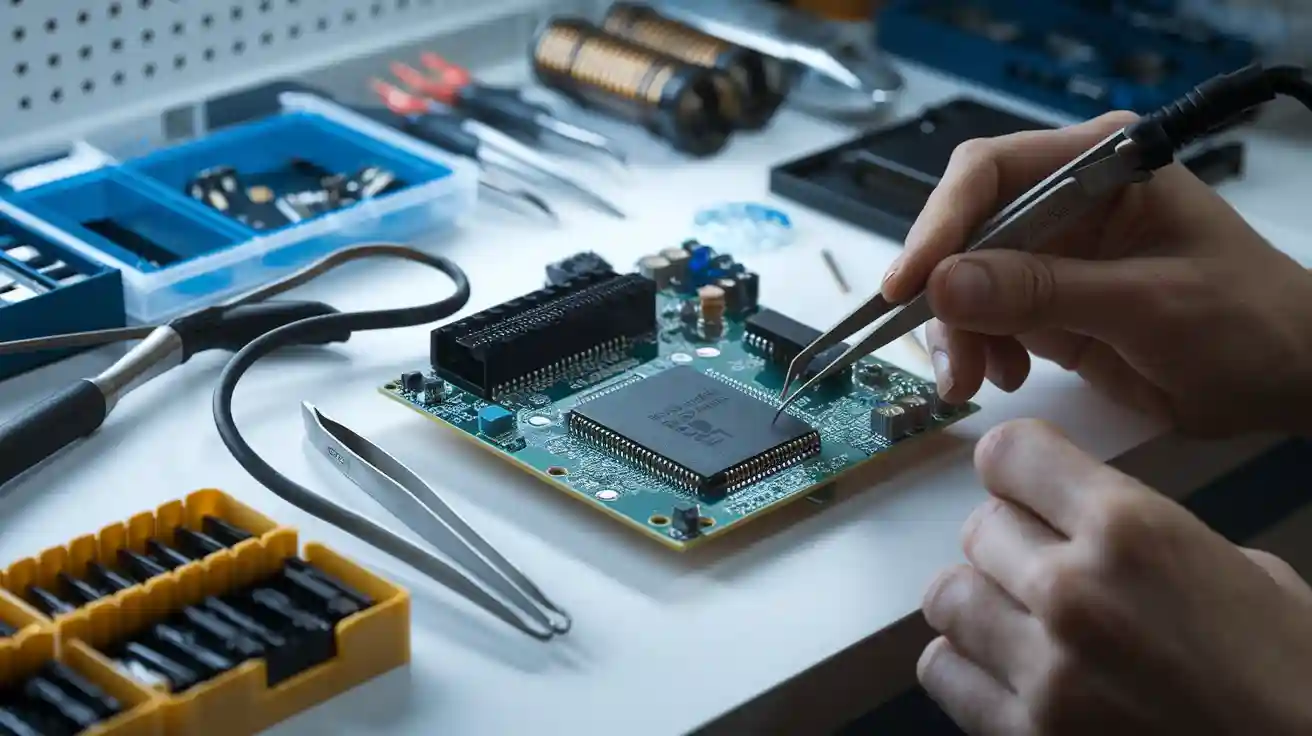
Placing SMT Components
Using Tweezers for Precise Placement
Place SMT components onto the PCB using fine-tipped tweezers. Start with the smallest components, such as resistors and capacitors, and work your way up to larger ones. Position each component carefully on the solder paste. Precision at this stage reduces the risk of misalignment during soldering.
Adjusting Alignment Without Disturbing Solder Paste
After placing the components, check their alignment. Use a magnifying glass or microscope for better visibility. If adjustments are needed, nudge the components gently without smearing the solder paste. Proper alignment ensures a clean and functional assembly.
Soldering SMT Components
Reflow Soldering with a Hot Air Gun or Reflow Oven
Reflow soldering is the most efficient way to secure components to the PCB. Place the assembled PCB in a reflow oven or use a hot air gun to heat the solder paste. The paste will melt and form solid connections as it cools. Follow the recommended temperature profile for your solder paste to avoid overheating or underheating.
Hand Soldering for Small Adjustments
For minor corrections or components that cannot withstand reflow temperatures, hand soldering is an excellent alternative. Use a fine-tipped soldering iron to apply heat precisely. Add a small amount of solder if necessary to ensure a strong bond.
🔧 Note: Reflow soldering accounts for 70% of SMT assembly quality. Ensure your solder paste and equipment meet industry standards for the best results.
Inspecting the PCB Assembly
Checking Solder Joints and Alignment
Inspecting solder joints is a critical step in ensuring the reliability of your pcb assembly. Poorly formed joints can lead to electrical failures or mechanical instability. After soldering, examine each joint for smoothness and proper shape. A good solder joint should appear shiny and slightly concave, with no gaps or cracks. Misaligned components can also cause issues, so verify that all parts are seated correctly on their pads.
Timely inspections during the assembly process can save you from costly rework later. Automated Optical Inspection (AOI) systems are highly effective for catching surface defects after component placement. These systems identify alignment errors and missing components before soldering begins. For more complex assemblies, X-ray inspection is invaluable. It allows you to check hidden solder joints, ensuring they meet quality standards. Post-assembly inspections further confirm the integrity of solder joints, reducing the risk of defects in the final product.
🔍 Tip: Always inspect your pcb at multiple stages to catch errors early and improve overall quality.
Using Magnification Tools for Detailed Inspection
Small defects in solder joints or component placement can be hard to spot with the naked eye. Magnification tools like microscopes or magnifying lamps make it easier to identify these issues. Use these tools to closely examine each solder joint for cracks, voids, or insufficient solder. Pay special attention to areas with dense components, as defects are more likely to occur there.
For high-precision work, consider investing in a digital microscope. This tool provides a clear, enlarged view of your pcb, helping you detect even the smallest imperfections. Regular use of magnification tools ensures that your assembly meets professional standards and performs reliably.
🛠️ Note: Detailed inspections with magnification tools enhance the long-term reliability of your pcb assembly.
Troubleshooting SMT Assembly Issues
Common Problems and Fixes
Cold Solder Joints and Rework Techniques
Cold solder joints are a frequent issue in SMT assembly. These occur when the solder fails to melt completely, resulting in weak or unreliable connections. You can identify them by their dull, grainy appearance. To fix this, reheat the joint using a fine-tipped soldering iron. Apply a small amount of flux to improve solder flow and ensure a strong bond.
Preventing cold solder joints starts with proper reflow soldering. Follow the recommended temperature profile for your solder paste. This ensures the solder melts and solidifies correctly, creating durable connections.
Misaligned Components and Adjustment Tips
Misaligned components can disrupt the functionality of your PCB. They often result from placement inaccuracies or excessive solder paste application. Use tweezers to gently reposition components before soldering. If the solder has already hardened, reheat the joint and adjust the component carefully.
To minimize misalignment, focus on precise solder paste application. Stencil printing is the most reliable method. Control parameters like squeegee pressure and speed to achieve consistent results.
Testing the PCB Circuit
Continuity Testing with a Multimeter
Testing your PCB ensures all connections function as intended. Use a multimeter to perform continuity tests. Place the probes on the solder joints of connected components. A beep or low resistance reading confirms a proper connection. This step helps you identify open circuits caused by incomplete soldering.
Identifying Short Circuits or Open Connections
Short circuits can occur due to solder bridging between adjacent pads. Inspect the PCB visually or use a multimeter to detect these issues. If you find a short, remove the excess solder with a desoldering wick or solder sucker. For open connections, reapply solder to the affected joint.
Preventing Future Issues
Best Practices for Solder Paste Application
Solder paste application is critical for reliable SMT assembly. Use a stencil to deposit the paste evenly on the PCB pads. Control parameters like squeegee pressure, speed, and angle to prevent defects. Proper application reduces the risk of solder bridging and ensures strong joints.
- 60% to 90% of quality defects in SMT assembly stem from solder paste printing.
- Open solder joints, solder shorts, and misaligned components account for 75% of soldering defects.
Improving Component Placement Accuracy
Accurate component placement enhances the reliability of your PCB. Organize your workspace to keep components within easy reach. Use magnification tools to position parts precisely. Practice on test PCBs to refine your skills and reduce errors.
💡 Tip: Investing time in preparation and practice significantly improves your assembly quality.
Refining Your SMT Assembly Skills
Practicing on Test PCBs
Benefits of Using Practice Kits
Practice kits are an excellent way to build your confidence in SMT assembly. These kits provide pre-designed PCBs and components, allowing you to focus on improving your technique without worrying about design errors. By working with these kits, you can master essential skills like solder paste application, component placement, and soldering. They also help you identify common mistakes early, saving you time and frustration on actual projects.
🛠️ Tip: Start with beginner-friendly kits before moving on to more advanced ones. This gradual approach ensures steady progress.
Progressing to More Complex Projects
Once you feel comfortable with practice kits, challenge yourself with more complex projects. Try assembling PCBs with higher component density or advanced features like multi-layer designs. Tackling these projects will enhance your precision and problem-solving skills. Over time, you’ll gain the expertise needed to handle professional-grade assemblies.
Learning from Mistakes
Documenting Errors and Solutions
Mistakes are inevitable, but they’re also valuable learning opportunities. Keep a detailed log of errors you encounter during assembly. Note the cause, the corrective action you took, and the outcome. This practice helps you identify patterns and refine your process. For example, using tools like SPC (Statistical Process Control) software can help you monitor trends and implement corrective actions effectively.
- Identify critical process parameters.
- Establish control limits and monitor trends.
- Use SPC software for data collection and analysis.
- Train yourself in SPC principles and techniques.
- Implement corrective actions based on SPC data.
- Continuously refine your methods and metrics.
Engaging with Online Communities for Advice
Joining online forums and communities can accelerate your learning. These platforms connect you with experienced hobbyists and professionals who can offer valuable advice. Share your challenges, ask questions, and learn from others’ experiences. Engaging with these communities also keeps you updated on the latest tools and techniques in SMT assembly.
Upgrading Tools and Techniques
Investing in Advanced Equipment
As your skills improve, consider upgrading your tools. Advanced equipment like digital microscopes, precision soldering stations, and automated reflow ovens can significantly enhance your efficiency and accuracy. These tools not only make your work easier but also improve the quality of your solder joints and overall assembly.
Exploring Automation for Repetitive Tasks
Automation can save you time and reduce errors in repetitive tasks like solder paste application and component placement. Tools like stencil printers and pick-and-place machines streamline these processes, allowing you to focus on more intricate aspects of assembly. Automation also ensures consistent results, which is crucial for high-quality PCBs.
💡 Tip: Start small by automating one or two tasks. Gradually expand as you become more comfortable with the technology.
Mastering DIY SMT assembly is a journey that combines precision, practice, and persistence. By following essential tips, you can achieve professional results while enjoying the process of creating functional electronics.
- Focus on design optimization and DFM principles to streamline your projects.
- Continuously refine critical processes and control parameters for consistent quality.
- Implement robust inspection and testing methods to ensure reliability.
- Leverage data analysis and embrace new technologies to stay ahead.
Practicing regularly and learning from mistakes will sharpen your skills. Each successful assembly brings a sense of accomplishment and the thrill of innovation. Dive in, refine your techniques, and experience the satisfaction of building something extraordinary.
FAQ
What is the most important tool for DIY SMT assembly?
A fine-tipped soldering iron is essential. It allows you to work precisely on small components. Pair it with tweezers and a magnifying glass for better control and visibility. These tools ensure accuracy and reduce errors during assembly.
💡 Tip: Invest in high-quality tools to improve your results and save time.
Can I assemble SMT components without a reflow oven?
Yes, you can use a hot air gun for reflow soldering. It’s a cost-effective alternative for beginners. However, a reflow oven provides consistent heating, which improves soldering quality. Consider upgrading as your skills advance.
🔧 Note: Start with basic tools and upgrade gradually as you gain confidence.
How do I avoid solder paste defects?
Use a stencil for even solder paste application. Control the pressure and speed of the squeegee to prevent smearing or gaps. Proper application minimizes defects like solder bridging and ensures strong connections.
- Key Tip: Practice on test PCBs to refine your solder paste technique.
What should I do if a component is misaligned?
Gently reposition the component with tweezers before soldering. If the solder has hardened, reheat the joint and adjust carefully. Precision during placement reduces the need for rework.
🛠️ Advice: Use magnification tools to check alignment before soldering.
How can I improve my SMT assembly skills?
Practice regularly on test PCBs. Document your mistakes and learn from them. Engage with online communities for advice and tips. Over time, you’ll gain the expertise needed for complex projects.
🌟 Pro Tip: Start small, stay consistent, and celebrate your progress!